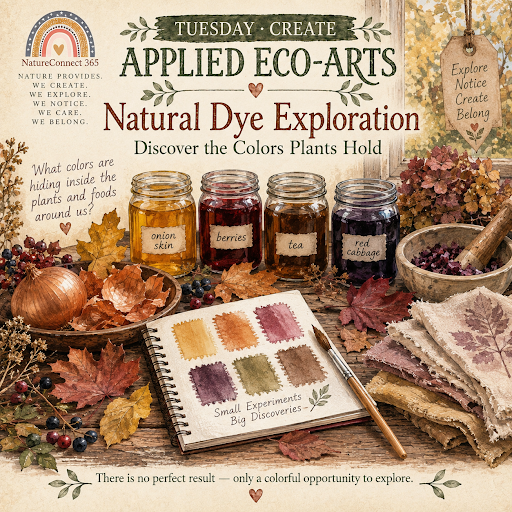
Discover the Colors Plants Hold
What colors are hiding inside the plants and foods around us?
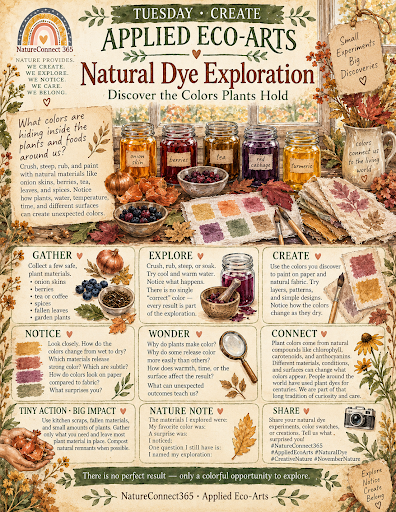
Explore natural color using a small collection of safe plant materials such as onion skins, tea, coffee, berries, spices, fallen leaves, or garden plants. Crush, rub, steep, soak, and paint with the colors you discover while noticing how plant material, water, temperature, time, paper, and fabric influence what appears.
A brilliant red berry may create purple. A brown onion skin may release gold. A colorful leaf may leave almost no color at all.
There is no perfect result to achieve.
Let each material become a creative partner in an exploration of color, change, chemistry, place, and surprise.
🌱 Materials
Several safe natural color materials
White or light-colored paper
Small pieces of natural fabric such as cotton, linen, or muslin
Scrap fabric or reclaimed natural-fiber cloth
Small reusable bowls or jars
Warm and cool water
Spoons
Paintbrushes
Wooden craft sticks or reusable stirrers
Mortar and pestle or spoon for gently crushing materials
Cutting board
Child-safe knife with adult supervision, if needed
Measuring cup
Small saucepan or heat-safe container for adult-assisted warm extraction, optional
Fine strainer or reusable cloth for straining
Reusable gloves, if desired
Apron or old shirt
Protective washable work surface
Absorbent cloth or reused paper
Pencil
Colored pencils
Labels or masking tape
Journal or sketch paper
Possible color materials include:
Yellow or red onion skins
Black tea
Coffee
Turmeric
Red cabbage
Beets
Blueberries or blackberries
Grape skins
Spinach
Safe culinary herbs
Fallen leaves
Flower petals from known, safe plants
Other locally available, safely identified plant materials
You do not need everything on this list. Three or four materials are enough for a rich investigation.
Safety Note: Natural does not automatically mean safe. Use only plants and foods you can confidently identify. Avoid unknown plants, berries, mushrooms, irritating species, chemically treated plant materials, and protected plants. Natural dye mixtures are creative materials and should not be eaten. Some materials, especially turmeric, berries, beets, and concentrated plant liquids, can strongly stain skin, clothing, counters, and furniture. Protect work surfaces and supervise children. Any cutting, boiling, or heated extraction should be completed by or with a responsible adult.
✨ Create
1 • Begin with Color
Before making anything, look at your materials.
Arrange them on a light-colored surface.
Notice:
Bright colors
Muted colors
Differences between inside and outside surfaces
Glossy and matte textures
Dry and moist materials
Thin and thick skins
Plant veins
Pigment on your fingers
Scent
Materials that already leave marks
Choose one material that draws your attention.
Ask:
What color do I think this material will make?
Record your prediction.
Then prepare to be surprised.
2 • Create a Before Record
Sketch or photograph your materials before extracting any color.
Make a small color swatch beside each one using colored pencil, crayon, watercolor, or another familiar art material.
Record:
Material:
Color before:
Texture:
Scent:
My prediction:
You will return to these observations later.
Your first task is not to be correct.
It is to notice what you expect.
3 • Try a Direct Color Test
Begin with the simplest possible experiment.
Take a safe plant material and gently:
Rub it across paper
Press it onto damp paper
Crush a small piece and make a mark
Rub it onto scrap fabric
Add a drop of water and try again
Compare the results.
Does the color look like the original material?
Is it brighter?
Duller?
Completely different?
Does the mark change as it dries?
Label your test so you remember which plant created it.
4 • Explore Color with Water
Place a small amount of one material into a reusable bowl or jar.
Add a little water.
Try cool water first.
Stir, press, or gently crush the material.
Observe the water.
Does color appear immediately?
Does it emerge slowly?
Does nothing seem to happen?
Repeat with another material.
Keep each experiment separate so you can compare the results.
5 • Explore Warmth & Time
Some plant materials release more visible color when warmed or allowed to steep.
With appropriate adult support, place one dye material in warm water or gently heat it in a dedicated craft container.
Observe:
The first color that appears
How quickly the water changes
Whether the plant material changes color
Whether the liquid becomes darker over time
Changes in scent
Steam and condensation
Material sinking or floating
For children, an adult can prepare warm botanical color beforehand and allow it to cool before the creative exploration begins.
Do not taste dye mixtures, even when they are made from edible ingredients.
6 • Strain the Color
Once enough color has entered the water, strain the liquid into a clean reusable container.
Now compare:
Plant material → Colored liquid
Are they the same color?
Perhaps golden onion skins produced amber liquid.
Perhaps purple cabbage created blue-purple water.
Perhaps a vivid leaf created only a pale tan.
Record what happened.
This is your botanical color.
7 • Paint with Plant Color
Use a paintbrush to make marks on white or light-colored paper.
Try:
One brushstroke
Several layers
Dots
Lines
Circles
Leaf shapes
Washes
Overlapping colors
Light and dark areas
A simple seasonal pattern
Let one layer dry before adding another.
Does layering deepen the color?
Does the dried color look different from the wet color?
Try painting beside your original prediction.
8 • Test the Color on Fabric
Place a small piece of cotton, linen, muslin, or another natural-fiber fabric on your protected surface.
Brush, dab, dip, or press botanical color onto it.
Compare the result with paper.
Notice:
How quickly the liquid absorbs
Whether the color spreads
How the weave affects the mark
Whether the color appears lighter
Whether edges remain sharp or blur
How the color changes while drying
This is an exploration rather than a permanent fabric-dyeing process. Untreated natural colors may fade, shift, wash out, or change over time.
That change is part of what you are investigating.
9 • Make a Natural Color Test Strip
Create a simple record of all the colors you discovered.
Divide a piece of paper or fabric into sections.
Add one botanical color to each section.
Label it with:
Material
Extraction method
Water temperature
Approximate steeping time
Wet color
Dry color
For example:
Yellow onion skin · warm water · 20 minutes · golden amber
Or:
Blackberry · crushed directly · violet → muted purple
Your test strip becomes the beginning of a seasonal color library.
10 • Compare Your Predictions
Return to the observations you made at the beginning.
Place your original color predictions beside your finished botanical colors.
Ask:
What matched?
What changed?
What surprised me?
Instead of judging a result as successful or unsuccessful, treat every outcome as information.
A material that produced almost no visible color has still taught you something.
🎨 Create with Natural Color
Use your botanical colors to:
Paint a November color study
Create abstract washes
Make seasonal bookmarks
Paint leaf and seed shapes
Create botanical color swatches
Make handmade cards
Paint reclaimed paper
Create a natural-color gradient
Compare colors on paper and cloth
Make a seasonal color wheel
Create simple nature symbols
Layer several botanical colors
Make a collaborative color chart
Begin a natural pigment library
Save your observations for next week’s Color Collection Journal
🔍 Notice
Pay attention to:
Which materials release color immediately
Which need water
Which respond to warmth
Colors that differ from your predictions
Wet versus dry colors
Changes created by time
Colors that deepen when layered
Differences between paper and fabric
Plant materials that produce little visible pigment
Differences between direct rubbing and liquid extraction
Scent as materials steep
Changes in the plant material itself
Colors that fade while drying
Colors that become stronger
Unexpected combinations when colors overlap
Notice the entire process—not only the final color.
💭 Wonder
Where does plant color come from?
Why does a plant sometimes produce a dye different from the color we see?
Why do some plants release color more easily than others?
What difference does warm water make?
How does time affect color extraction?
Why does a wet color sometimes look different after drying?
Why does the same dye look different on paper and fabric?
What happens when botanical colors overlap?
Why do some natural colors fade?
Can brown, gray, and tan contain many different colors?
How have people learned which plants can create useful dyes?
What might our local landscape’s color palette reveal about the season?
What can an unexpected result teach us about experimentation?
🌎 Connect
Plants contain different pigments and other compounds that contribute to the colors we see.
Chlorophyll contributes green to leaves and helps plants capture light for photosynthesis. Carotenoids contribute many yellow and orange colors. Anthocyanins can contribute red, purple, and blue colors in flowers, fruits, and some leaves. Other plant compounds can also produce color when materials are crushed, soaked, heated, or otherwise processed.
But the color we see in a plant is not necessarily the color it will leave on paper or cloth.
Plant chemistry interacts with water, temperature, oxygen, light, time, and the surface receiving the pigment. Some compounds dissolve readily in water. Others do not. Some colors shift as conditions change.
Traditional dye practices around the world developed through generations of careful observation, experimentation, cultural knowledge, and relationships with locally available materials.
Our small investigation introduces that larger idea:
Color can be something we encounter, observe, test, and learn from.
🌈 Explore Further
Compare red and yellow onion skins.
Test the same material in cool and warm water.
Compare fresh and dried plant material.
Paint one dye on both paper and fabric.
Record colors immediately and again the next day.
Place one sample in light and another in a darker location and observe changes over time.
Layer two botanical colors.
Compare direct rubbing with water extraction.
Create a chart of predicted and actual colors.
Research one plant traditionally used for dyeing.
Explore natural dye traditions from different cultures with respectful, reliable sources.
Investigate why natural-fiber fabrics absorb dyes differently.
Photograph colors at each stage.
Give each discovered color a descriptive name.
Carry your favorite colors into next week’s Color Collection Journal.
📸 Share
Photograph your natural materials, color experiments, or finished botanical color test strip.
Share:
The materials you explored
The color you predicted
The color you actually discovered
A material that surprised you
Your strongest color
Your faintest color
A wet-to-dry change
A difference between paper and fabric
A color name you invented
A question you want to investigate next
Share with #NatureConnect365 and invite others to discover what colors familiar plants and foods may hold.
❤️ Tiny Action • Big Impact
Begin your natural dye exploration with materials already available to you.
Save onion skins from cooking.
Use a tea bag after brewing.
Experiment with coffee grounds, berry scraps, vegetable trimmings, spent flowers, or a few safely identified fallen materials.
Before gathering something living outdoors, ask:
Can I discover color from something already released, already used, or already available?
Using kitchen scraps and modest amounts of fallen material can transform something that might otherwise be discarded into an opportunity for observation and creativity.
Afterward, compost untreated plant remnants when appropriate.
Explore color while taking as little as possible from the living landscape.
📝 Nature Note
The materials I explored were:
Before beginning, I predicted:
The first color to appear was:
The material that released the strongest color was:
The material that surprised me most was:
On paper, the color looked:
On fabric, the color looked:
After drying, I noticed:
A color name I invented was:
Something that did not happen as expected was:
One question I still have is:
A color I want to look for outdoors next week is:
I named my natural dye exploration:
#NatureConnect365 #StartWhereYouAre #NatureConnectNY #NatureConnectED
#AppliedEcoArts #EveryBodyEveryDay #NatureAsPartner #TinyActionsBigImpact